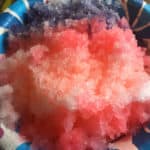
This homemade snow cone syrup works great for snow cones and it’s easy to make! I also costs much less than buying the pre-made syrup. My kids like this syrup and it works good with shaved or crushed ice.
I have noticed there is a slight difference in texture of snow cone syrup versus shaved ice syrup. Most snow cone syrup you buy in the store are slightly thicker so they will cover most homemade crunchier ice cones while shaved ice syrup is slightly thinner so it runs between the smaller shaved ice crystals.
This recipe will work for both but is slightly thinner because I use it on shaved ice. If you find it’s too thin you can boil the mixture slightly longer to reduce the syrup or add slightly less water. If you want it thinner then add slightly more water.
What you need to make homemade snow cone syrup:
makes ~5 cups syrup
- 1 1/2 teaspoon flavoring
- 1 – 2 teaspoon citric acid – this depends if you want it sour or sweet, you can skip this if you don’t want any acidity
- 3 cups water
- 4 cups sugar
- 1 cups corn syrup
- Food coloring if desired
Instructions
- In a pot add water, sugar and corn syrup and heat until it comes to a boil. Boil for 2-3 minutes so the mixture reduces slightly and can coat the back of a spoon then remove from heat.
- Stir in flavoring, citric acid and food coloring.
- Cool before use.
Here are a few other cool treats to beat the heat:
- Strawberry Apple Crush Smoothie RECIPE HERE
- Mango Banana Berry Smoothie RECIPE HERE
- Avocado Berry Smoothie RECIPE HERE


Homemade snow cone syrup
Ingredients
- 1 1/2 teaspoon flavoring
- 1 – 2 teaspoon citric acid – this depends if you want it sour or sweet you can skip this if you don’t want any acidity
- 3 cups water
- 4 cups sugar
- 1 cups corn syrup
- Food coloring if desired
Instructions
- In a pot, add water, sugar and corn syrup and heat until it comes to a boil. Boil for 2-3 minutes so the mixture reduces slightly and can coat the back of a spoon then remove from heat.
- Stir in flavoring, citric acid and food coloring.
- Cool before use.